Sunday, January 9, 2011

Recycled vintage phones by C. Reinke-FANCY PHONES


FANCY PHONES BY:

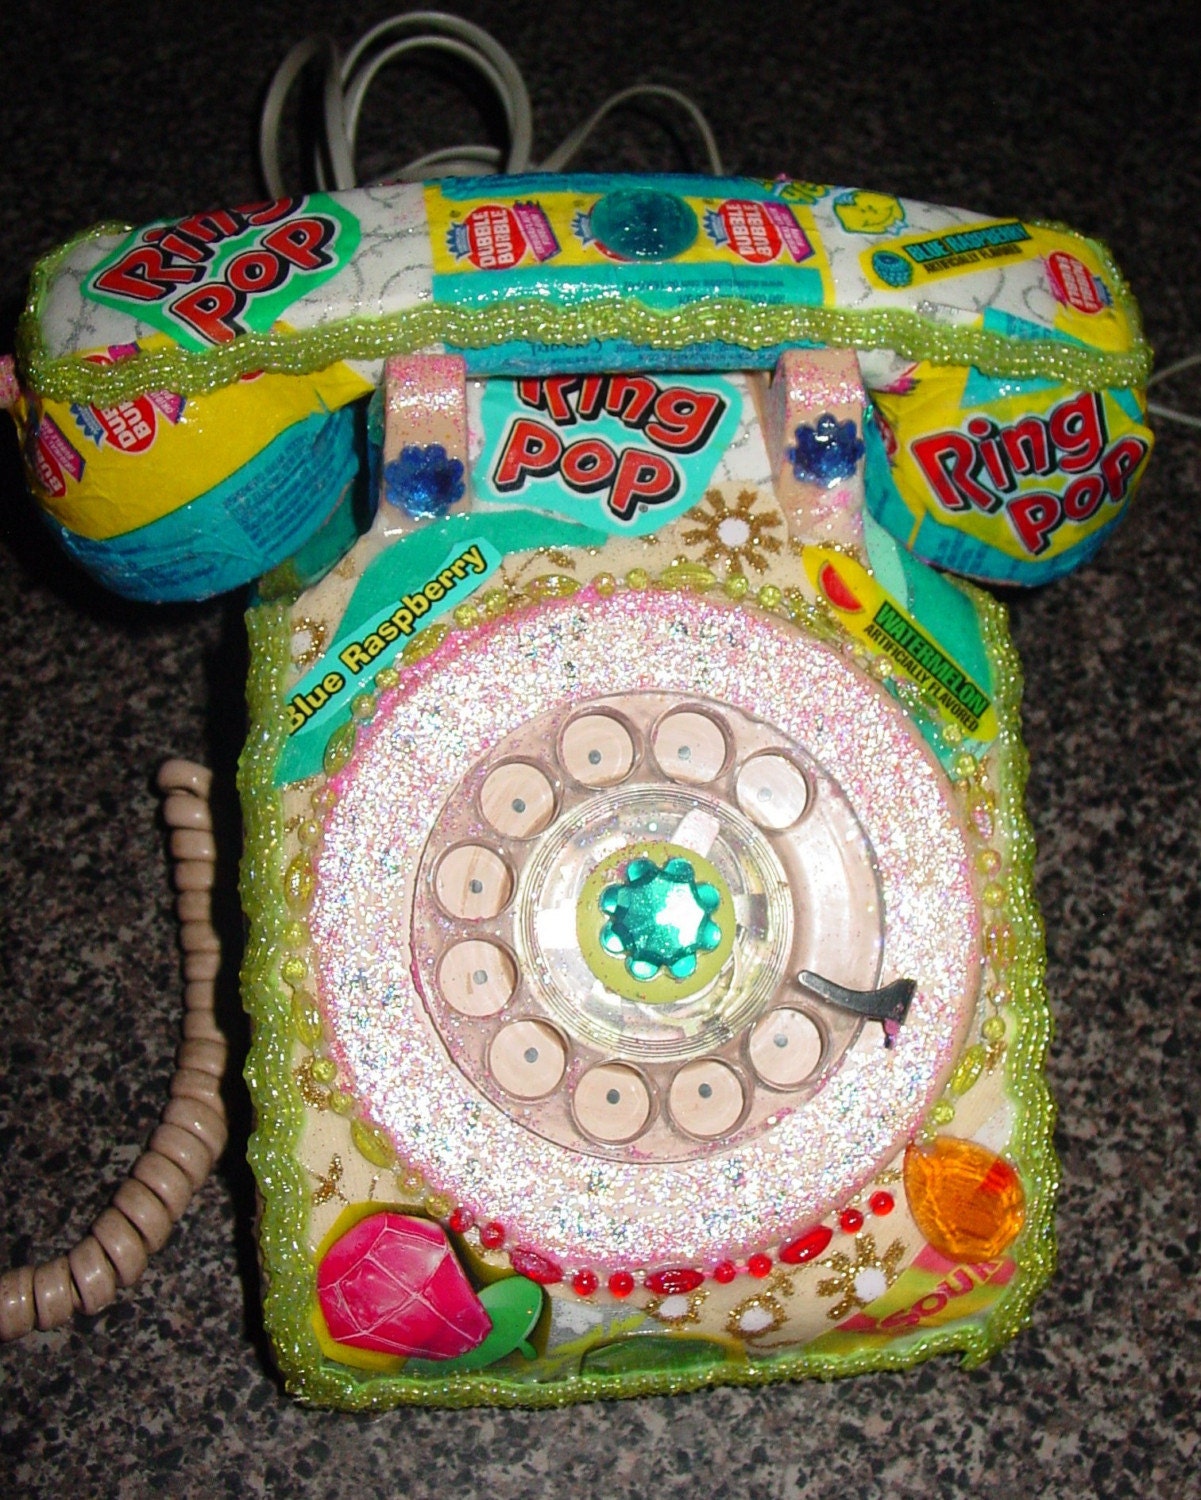
recycled vintage dial phone by C.Reinke RING POP candy wrappers.Kitsch at its best
zoom
Candy wrappers and handmade silkscreen and glitter papers with glass beaded trim have been used in this vintage dial phone that still works.I have always loved using candy wrappers in my work, as can be seen in this suitcase for sale .See below.

Candy wrappers are filled with so much color and I have reused them rather than throw them away. My daughters love ring pops and this was the inspiration for this phone.I also incorporated gum lemon heads, jaw breakers and other candy wrappers. I used these wonderful papers hand made from India. Glass bead trim and a couple of bubbles finish it off.

I will have my web site up and running soon so you can learn more about me and my art.

BUY GREEN!
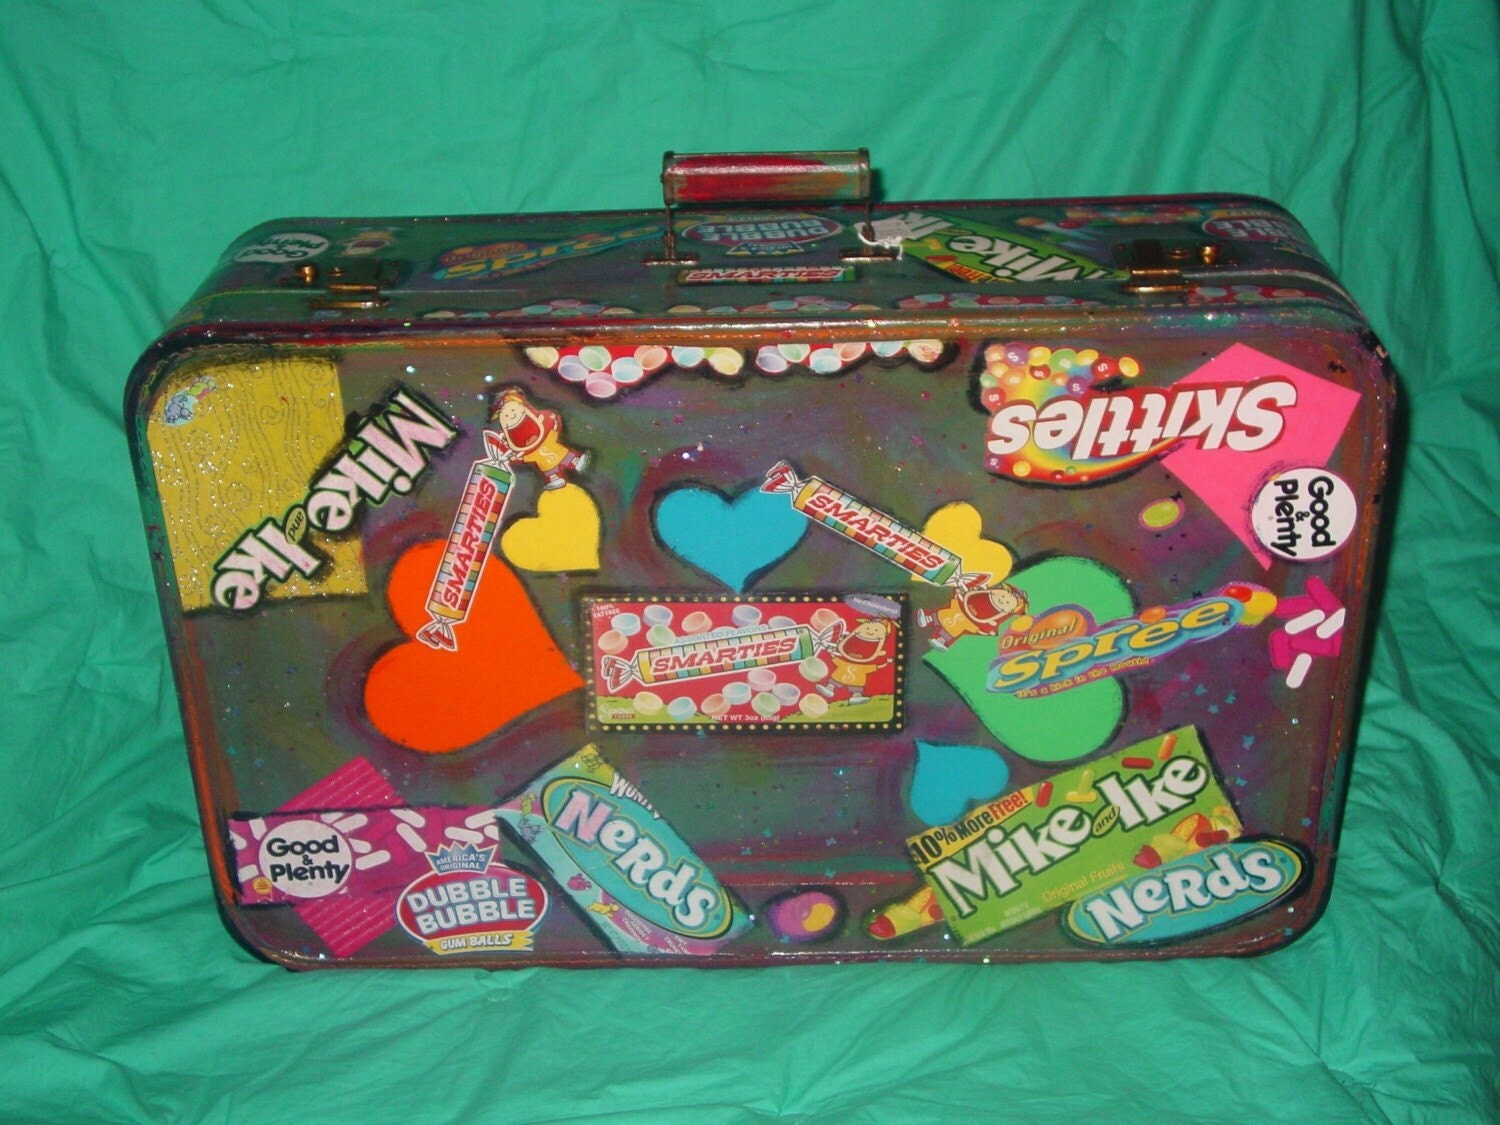
Recyled  large vintage  1940's suitcase withcolorful candy wrappers and handmade papers
zoom
Vintage 1940 's collage suitcase, square design. Handmade papers and candy wrappers topped off with lots of star glitter. This is a personal favorite. the inside is finished off also with papers and glitter. Note the wonderful brass hardware.

Candy delight dimensions 25 ½ long 16 tall, and 8 wide.


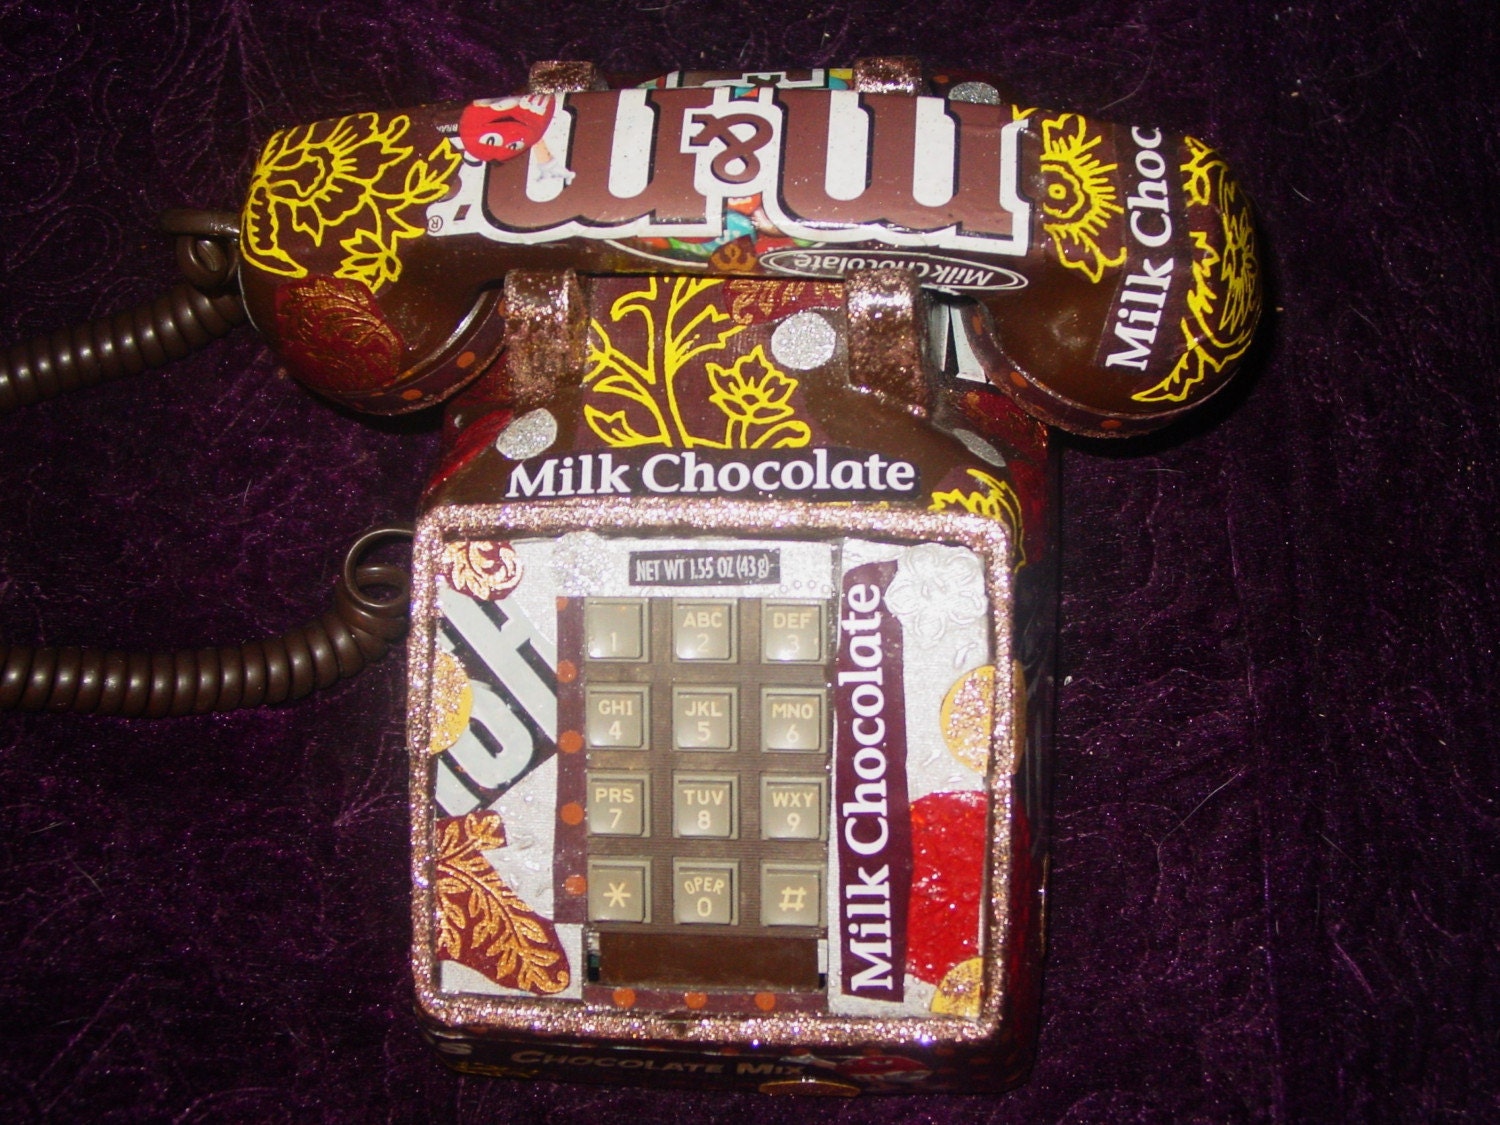
recycled rotary Phone by artist C. Reinke
zoom
t
Recycling old rotary phones is a true passion of mine. My daughter gave me the idea of using candy wrappers and I loved it. They all work. I love them because 1) I can always find them when they ring and 2) they never lose battery power. and then 3) they make a great conversation piece and add to your decorum. I have used acid free glues with the handmade silk screened papers , I have finished it off with varnish.
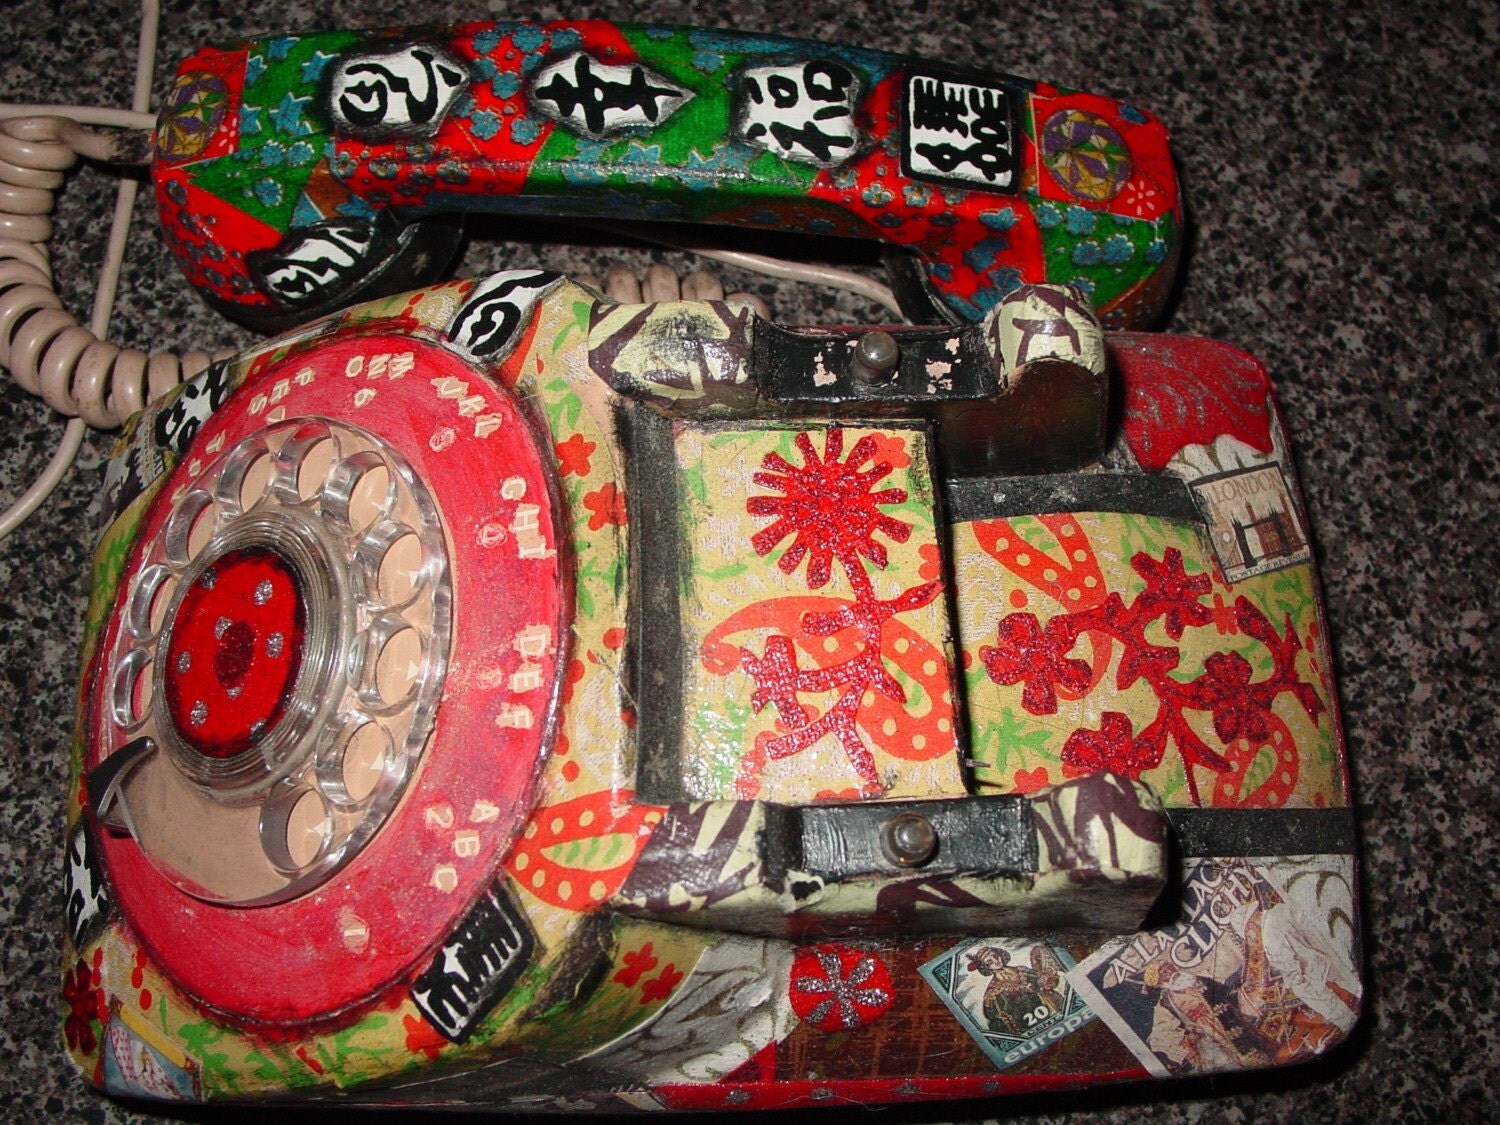
Recycled vintage phone by C. Reinke Asian Nights
zoom
layers of handmade silkscreen papers from India with Asian symbols and motifs are used on this vintage altered phone that still works.Acrylic Paints have been used to blend this OOAK design into a cohesive work of art.
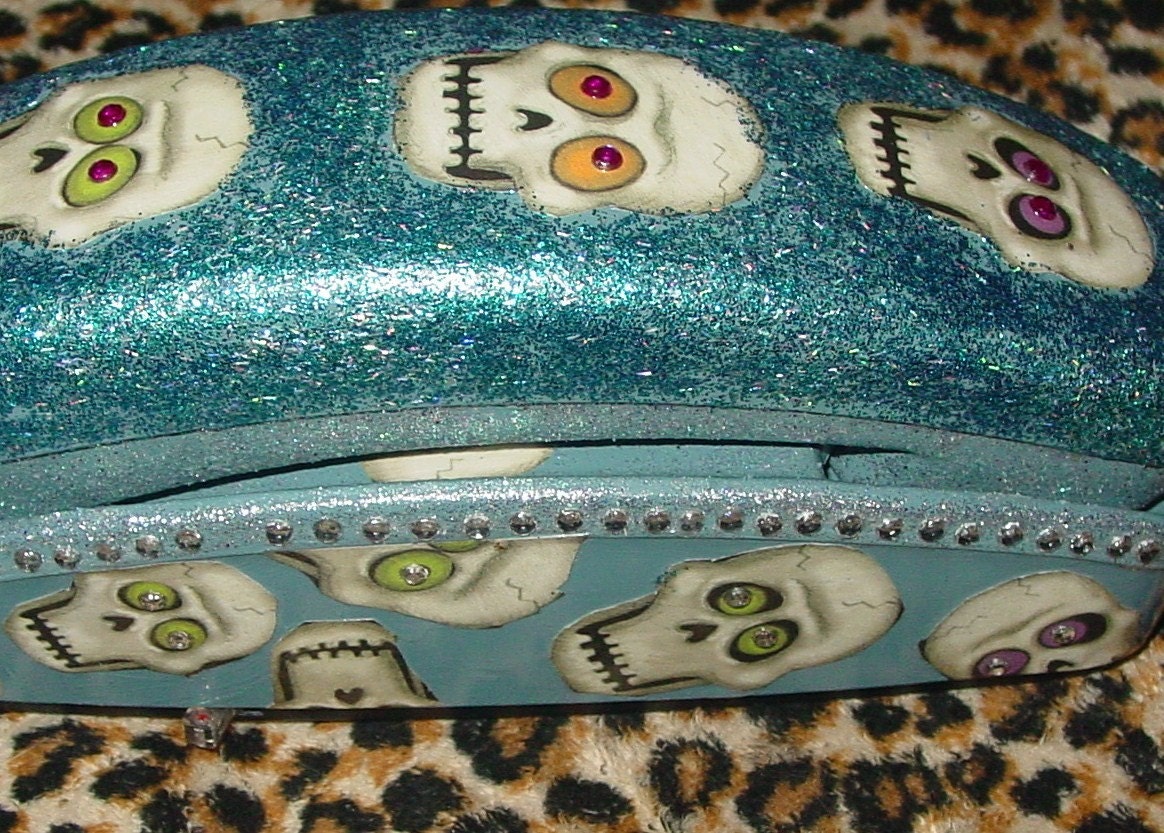
FUNKY skull recycled vintage dial phone by C.Reinke  lots of kitsch sparkle
zoom
Working 1960s/70s powder blue hand held dial phone by GTE has lots of holographic glitters applied to handle while dancing funky funny skeleton heads with plastic rhinestone eyes smile back.

This phone works.It is prefect as an accent piece in your home decor or office

I have had a phone that was featured on regretsy ( a site that pokes fun at unusual art and handmade, its being roasted!! ) which after sold for $175.oo to a New Yorker! Phones are one of my passions and specialties.

BUY GREEN!


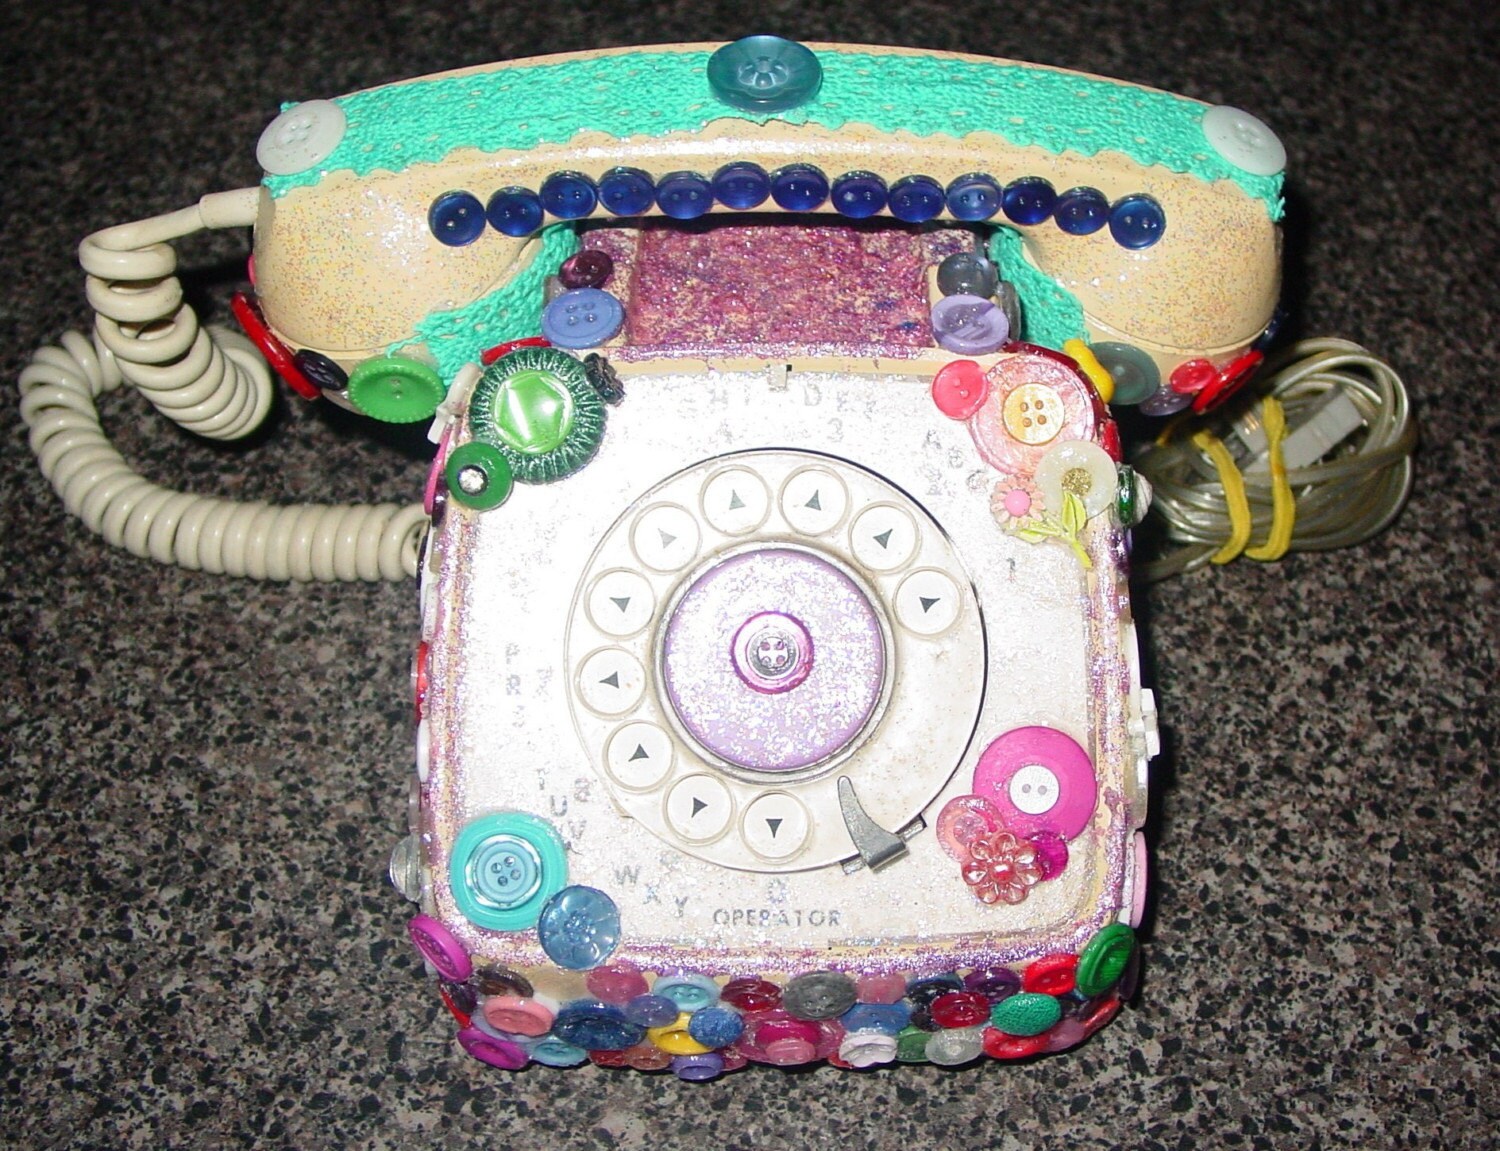
recycled vintage dial button phone by M. Reinke.
zoom

hundreds of vintage buttons of bright colors have been used on this lovely dial phone that is still in working condition.Many of the buttons used are precious and collectibles, at every turn you can get lost in just looking at each individual. My daughter made this phone and I am very impressed. She outdid me! It is the finest phone in the collection. 20 hours of time were spent on this project and $100.oo in material costs alone. These buttons came from a vintage collection of Funky Findz, she deliberately choose each button and its placement with my thought and deliberation div


READ ALL ABOUT this PHONE THAT FEATURED ON REGRETSY here

and the update IS REGRETSY FRIEND OR FOE OF ETSY?


Posted by:

Saturday, January 8, 2011

Top Gear meets Lego (kinda)

I said there would be more on Lego... this is it:

I am a fan of Top Gear (UK) and as always, when it comes to presenter James May... it's all "kinda" :)

Did you catch the special tv show where James May took it upon himself to commission almost 1,000 volunteers to build a 20-ft tall house made from Lego in Surrey, UK in mid-2009 for his BBC show Toy Stories? He used... get this... 3.3 million Lego pieces (hence the 1,000 volunteers!)

Whilst I would not want to sleep in it, having a smaller version in my garden would be all the art and sculpture I'd need! (Now! That's an idea.)


Image and more information via Modern Home Idea


The bathroom sink (working!)


Window, using translucent bricks


Highly uncomfortable bed, via Daily Mail, UK


The front door, via Top Gear


The sideboard in kitchen, complete with bread bin and chocolate bar, via Top Gear.


The washing machine (not working), via Top Gear.


The toilet roll next to toilet (not to be used... thankfully!), via Top Gear.


Lego, who donated all the Lego bricks for the project, apparently banned May from dismantling the structure upon completion. They were also apparently miffed that May did not seek their expertise and help in making this gigantic Lego-awesomeness (typical of May's absent-mindedness) because they would have chosen a method of building that would be mobile, rather than plonking on ground.

It did have to be demolished a few weeks after because the winery May chose for the location needed the land back to grow grapes for wine. I'm sure May would have been able to purchase a plot of land for that pet project of his and hence, allow the Lego house to remain till this day!

Now... about creating a mini house in my backyard as sculpture and interest... does anyone know if rainwater is bad for Lego?

Learn how to take a vintage suitcase and transform it into a recycled Christmas storage case

image image Why make a Christmas suitcase? Several reasons:

S T O R A G E - R E C Y C L E - GIFT GIVING

These are the handiest of all my creations. Making a Christmas suitcase from an old useless suitcase into a storage unit for your most valuable ornaments, hand made stockings, linens is a must. The plastic containers sold in department stores do not last or hold up, they crack with time. These hard shell suitcases, such as the Samsonite, are nearly indestructible. I store my best ornaments , in them. I take them out and set them around the tree or fireplace while they are empty. I have sold them to mothers who have wrapped all their individual packages and placed them all in the suitcase and used it, as part of their gift and it replaces the bag.


This is a process that takes only 4-5 hours , any one can do it! For those of you who might be intimidated by complex design elements that I have used on my suitcases why not try this first? Instead of using papers , you can use fabric and just do a simple cover on front and back, apply glitter to the sides,a couple of die cut accents and trim out. Use a medium size hard shell suitcase any color. Step 1: pick out your fabrics. I used a precut Christmas quilting bundle , they were the prefect size. These fabrics had glitters incorporated in them. image The color of your suitcase does not really matter, this is a good time to use one of the duller cases because you will be covering it entirely. imageSTEP 2:First lay down the fabric, there is no need to iron it as you can smooth it out, I choose different but complimentary fabric for the front and back but you can use the same on both sides if you wish . Use Modpodge

image

image

imageSTEP 3:I mixed up a THICK paste of glitters to apply to the sides.This is a quick fix and adds lots of Christmas sparkle!

image STEP 4: Make any repairs in the inside with the ever faithful glue gun. In this case the inside side lining had come undone. I simply reapplied it with a extra hot glue stick and gun. image STEP 5: Apply a matching fabric to the inside front bottom. I painted glitter on the sides, and added this cute clear die cut rain deer accent. (glue is drying)


imageSTEP 6:Pick out your trim and apply to edges to finish off your look, I used a charming vintage green loop trim on the edges and added a new red green trim to the outside center.

imageSTEP 7 : Now comes the funnest part, adding your embellishments. You can really add anything, rhinestones, plastics gems, sequin patches. For ease, I put die cut candy canes on the top and three cute Christmas trees on. image Step 8: Once a thin coat of varnish is applied we are finished! I suggest even adding a varnish to fabric as it can be easily cleaned and will hold up much better. However you do not have to add varnish to fabric if you don't want to. This is a fairly simple process. Now you can store your Christmas stockings in this years to come Going to grandmas house for Christmas?, Take this case and be the hit of the party! imageSTEP 9: yes sign your work and date it, you are an artist , this is YOUR CREATION, BE PROUD OF IT

image Finished inside image Buy this suitcase here

image

Make an old suitcase into a halloween storage case

image

TRICK


imageOR


imageTREAT


MAKE AN OLD SUITCASE INTO HALLOWEEN STORAGE for your costume and other delicate decorations. Bring it out next year and use it as a Halloween prop! This is a wood suitcase that had rich brown leather over it, I found it in a dump , it had black electric tape and crispy yellowed masking tape, the inside lining with filled with moth holes IT WAS PREFECT to convert into a Halloween suitcase.

image

wonderful old wood vintage suitcase, this is the condition that I found it in. I thought the color, the tape, holes and what not were prefect for a Halloween suitcase The inside has a great eerie green with holes that show an under tone of Orange again prefect for my theme. the bottom had a cream piece of cardboard added at some point of time. The lining was coming off in many spots and needed repair. I lay down the images with lots of mod podge covering completely back and front.

image image image image

While shopping at my all time favorite store TJ MAXX I found these black and orange vintage inspired napkins and a set of a banner that read trick or treat also vintage themed. these were the bias for my design.


Ingredients 1. lots of MOD PODDGE


image2.Acrylic paints 3.Glitters 4.fabrics and trim 5. Paper 6. Embellishments


imageHere is my artists box ( a big construction tool chest) that I use to store ( and lock when I had my gallery) of paints. Quite an investment. I can usually see the color in my minds eye that I want and dig until I find it or the colors to mix to create it.

imageThese are the paints that I chose and used. Golden paints artist grade are the highest quality and are my favorite paints to use. The applying paints is a very important process in my work, it adds depth, color , and with the Halloween suitcases, I can age them, make them look even older and more run down with the magic of paint. imageThis is only one case of my glitters, these all have a liquid base to them which I use to mix with my other dry glitters, my favorites are from the MARTHA Stewart line. image These are the glitters that I used and combination of liquid and dry, golds and one black. imageimage I mix the glitters much like paint and apply them with brushes. imageThe under side or bottom is allways addressed in my work, this case had a large base, here you can see that I have applied the paper napkins, distressed them a bit. image I have added to the bottom vintage inspired black and orange napkins and a creepy skull image I cut from one of my many books that I keep for my work. I glued first all the sides that needed repair and gave it a cleaning. The treatment, a bit of freebrez imageThe varnish is another important and necessary step, I choose sometimes water based or oil based depending on the project, for this case I am using water based. I put this on after it is completely dry . I also apply apants and glitters to the inside, in this case I adore the torn worn element of the natural condtion of this suitcase imageThe most fun part of all my suitcase art projects is adding the trim and in this case the jewel embellishments. I added this glorious trim to only the top so when you lay it down it is not effected. imageI also added several old black and white photos (from a book) with creepy frames.

Monday, January 3, 2011

Self sorting box

Isn't this idea great? Maybe not quite for washers and bolts and nuts, but maybe for nails and picture hooks for us home-makers or sewing bits for knitters.


This is the brainchild of Mr Wulf, who posted this last Jan (2010) on Craftster.org.

The top has the parts cut out in the shape for easy sorting and for interest (a large hole would work equally well).


Drawers labeled for easy removal:


But here's the smart thing: the shelves are staggered in depth!


Here's his post and a few tips to creating your own perfect sorting bin!

How cool to have your own one, painted in ubiquitous Gucci orange in gloss and sorts bobby pins and safety pins and other gizmos?? Or coloured pencils, markers, crayons and paintbrushes?